Sunday, June 12, 2011

Black Forest Ham and Vegetable Frittata

Brunch is one of my favorite things.  I love lazy Sunday afternoons gathered around a table of good friends, good coffee, and good food.  This frittata is a perfect dish to serve at your next Sunday brunch.  It's versatile, affordable, and super easy to make.


Black Forest Ham and Vegetable Frittata

Extra-virgin olive oil
5 slices black forest ham, diced
1 yellow onion, thinly sliced
1 cup diced asparagus spears
1 cup sliced button mushrooms
1 cup grated Parmesan cheese
12 eggs, beaten with 1/4 cup water
Salt and pepper


Preheat the oven to 350 degrees F. 


Coat a nonstick 10-inch saute pan with olive oil. Add the onion and saute until soft.  Add the mushrooms and ham, and cook for 2-3 minutes.  Add the asparagus and cook for another 2 minutes.  Remove from the pan from the heat.


In a bowl, add the Parmesan cheese to the beaten eggs and season lightly with salt and pepper.

Stir the eggs into the pan with the ham and vegetables.  Once the eggs set on the bottom and around the sides of the pan, place the pan in the preheated oven for 7 to 8 minutes or until the eggs are cooked through. Remove from the pan. Cut into wedges and serve. 

Saturday, June 11, 2011

Cilantro Pesto

I love pesto and its versatility.  Perfect on pasta, as a replacement for pizza sauce, as a dip for crusty french bread.

I had a large bunch of cilantro left after using some to add freshness to a curry dish I made for dinner one night.  Why not use it up and try making a cilantro pesto? 

The results were fantastic.  I used the sauce to marinate cod fillets for dinner.  I mixed it with some mayonnaise and used it as a sandwich spread.  My favorite was the cilantro pesto hummus that I made with my new food processor. 


Cilantro Pesto
1 bunch cilantro, washed and large stems removed
1/8 cup toasted pine nuts (or walnuts...or pepitas)
1 garlic clove, mined
2 tablespoons diced red onion
1/2 teaspoon chili paste or sriracha
A splash of vinegar, or a few squeezes of lime juice, or both
1/4 to 1/2 cup extra virgin olive oil
Salt and pepper, to taste


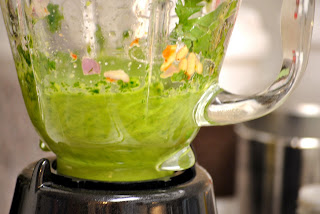
Place all ingredients (except for olive oil) in a blender or food processor.  Turn the appliance on and slowly stream in the olive oil until the mixture starts to blend.  Process until the pesto is smooth or reaches your desired consistency.


Cilantro Pesto Hummus

1 garlic clove
1 (14.5 ounce) can chickpeas, drained and rinsed
1/4 cup cilantro pesto (recipe above)
3 tablespoons water
1/4 cup extra virgin olive oil
Salt and pepper, to taste

Place the garlic clove in a food processor and process until minced.  Add the chickpeas, water, and pesto.  Turn the food processor on and slowly stream in the olive oil, stopping occasionally to scrape down the sides of the bowl.  Mix for about 1-2 minutes, or until the hummus is smooth. Season with salt and pepper.


Saturday, June 4, 2011

Candy Bar Cookies

Alright, I no longer have any excuses for being a blogging failure.  First year of law school...over.  Moving to a new apartment...finished.  Starting summer clerkship...one week down.  My kitchen is all set up, I have my Kitchen-Aid mixer sitting on my counter (thanks, Mom!), and I'm ready to cook and bake!

My mom has been visiting me this past week and we've been reminiscing about things from my childhood.  I was trying to pinpoint when exactly I became so interested in cooking and baking.  My mom insists that I've loved playing in the kitchen since the beginning. I believe her.  Here I am helping bake Valentine's Day cookies at age 2.


She also reminded me of my 5th grade science fair project: The Magic of Baking.  I altered the amount of baking powder in muffins (from no leavening to twice what was called for in the control recipe).  I then measured the height of the muffins and enlisted my family to be taste-testers.  Unsurprisingly, we all agreed that the control recipe looked and tasted the best.  Sometimes, however, little tweaks here and there can drastically improve an otherwise so-so recipe.  

I can't even begin to estimate how many different chocolate chip cookie recipes I have tried in pursuit of finding the "perfect" one.  I started with the Tollhouse recipe on the back of the chocolate chips bag.  Nope, not it.  I then surveyed all of my mom's cookbooks.  Mrs. Fields's recipe?  Meh. Only okay.  Betty Crocker's?  I tried different amounts of flour, vanilla, sugar, and other ingredients and ultimately came up with my own recipe.  They were pretty close to perfect.  Chewy and soft in the middle, crispy on the outside.  Just enough salt.  Not cakey at all.  I thought my search was over.

A few years ago, I was waiting in a grocery store line and picked up an issue of Cook's Illustrated magazine.  CI is right up my alley.  All of the recipes are extensively tested and the instructions are extremely detailed.  Baking really is science.  I think that's part of why I enjoy it so much (hence my 5th grade project).

Flipping through the magazine, I found this article.  Perfect chocolate chip cookies?  Hmm...I had to see if this recipe lived up to mine.  So, naturally, I immediately went home and tried it.  A-MAZ-ING.  I was so wrong thinking I had reached perfection with my personalized chocolate chip cookie recipe.  If my cookies were great, these were incredible.  I think it all comes down to the brown butter.  It adds a nutty, toffee-like flavor dimension that you just don't get in most other cookie recipes.  I actually think this method is even easier than creaming the butter and sugar with a mixer, as called for in standard cookie recipes.  No mixer required for this one! 

I've used this dough to make white chocolate macadamia nut cookies, I've substituted some of the flour for ground oatmeal, and I've added dried fruit instead of chocolate.  Now I can say that chopped up candy bars make a great chocolate chip substitute as well.  Try this recipe, or go experiment on your own and let me know what turns out well for you!

Ingredients

1 3/4 cups all-purpose flour (8 3/4 ounces if you have a food scale)
1/2 teaspoon baking soda
14 tablespoons unsalted butter (1 3/4 sticks)
1/2 cup granulated sugar (3 1/2 ounces)
3/4cups packed dark brown sugar (5 1/4 ounces) (light is fine, too)
1 teaspoon salt
2 teaspoons vanilla extract
1 large egg
1 large egg yolk
2 cups chopped candy bars (any kind)

Instructions
 
1. Heat oven to 375 degrees. Line 2 baking sheets with parchment paper or, if you have them, use Silpat baking mats. Chop your candy bars.  Whisk flour and baking soda together in medium bowl; set aside.


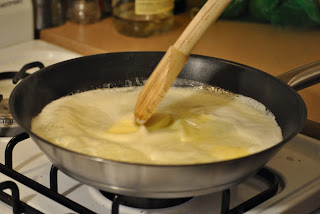
2. Heat 10 tablespoons of the butter in 10-inch skillet over medium-high heat until melted, about 2 minutes. Continue cooking, swirling or whisking the pan constantly until butter is dark golden brown and has nutty aroma, about 1 to 3 minutes. Remove skillet from heat and, using heatproof spatula, transfer browned butter to large heatproof bowl. Stir remaining 4 tablespoons butter into hot butter until completely melted.


3. Add both sugars, salt, and vanilla to the bowl with butter and whisk until fully incorporated. Add egg and yolk and whisk until mixture is smooth with no sugar lumps remaining, about 30 seconds. Let mixture stand 3 minutes, then whisk for 30 seconds. Repeat process of resting and whisking 2 more times until mixture is thick, smooth, and shiny.


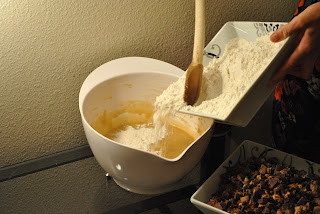
4. Using a wooden spoon, stir in flour mixture until just combined, about 1 minute. Stir in candy bar chunks.


5. Divide dough into 16 portions, each about 3 tablespoons (or use a big cookie scoop). Arrange 2 inches apart on prepared baking sheets.


6. Bake cookies until golden brown and still puffy, and edges have begun to set but centers are still soft, 10 to 14 minutes, rotating baking sheet halfway through baking. Transfer baking sheet to wire rack; cool cookies completely before serving.


A special thanks to Radha Kulkarni for helping me with the photos for this post!

Wednesday, March 30, 2011

Semi-Homemade (without Sandra Lee, thank goodness)...

I’m a little ashamed of this post...not to mention my blogging hiatus. Between memo, spring break, and upcoming exams, I’ve been short on time and the extent of my cooking or baking has been forced to become rather unimpressive. By unimpressive, I mean semi-homemade. Pretty sure I can blame Sandra Lee’s Food Network show for my ill-will towards semi-homemade cooking. I cannot stand Sandy Lee for multiple reasons. One, half the crap she makes looks and sounds disgusting (White Chocolate Polenta? Now that's just wrong!) Two, everything about her is rather obnoxious (Those tablescapes? Gag me. And her constant use of the word “pop”: I’m just gonna pop this crushed up bag of Ramen noodles and these canned mandarin oranges into this bowl of pre-packaged iceberg lettuce, and Look! It’s Chinese Chicken Salad. Gross. This serves to further illustrate my first point). But I digress…

Sandra Lee - putting the 'ho' in 'Semi-Homemade'


So, in light of my semi-homemade ways these past few weeks, I thought I’d share with you a few of the “quick-fix” recipes that I’ve made lately.  These are pretty much the easiest to make. No really—so easy (as in like two ingredients). And SO much more appetizing than anything you’d see on Sandra’s FN show.

Spaghetti & Meatballs
A bag of frozen meatballs (my favorite variety comes from Costco, but Trader Joe’s has some good ones, too)
1 jar of quality marinara sauce (my favorite is TJ’s Arrabiata sauce)
Noodles (I think y'all have this part down)

Put the frozen meatballs on a plate and defrost them for a bit in the microwave (makes this “recipe” even faster)…maybe 3 minutes of 50% power. Pour the jar of sauce into a medium saucepan and heat on the stove. Put the meatballs in the sauce. Simmer until meatballs are heated through. I like to make a bunch of meatballs at a time. You can use leftovers to make meatball subs on toasted baguette with melted provolone. Seriously so easy. And so good.

BBQ Pulled Chicken Sandwiches
 Frozen (or fresh, doesn’t matter) chicken breasts or tenderloins
1 jar of BBQ sauce (again, I love TJ’s Kansas City BBQ sauce…it’s fabulous & doesn’t have any corn syrup or other gross ingredients)
Prepackaged coleslaw
Hamburger buns

I usually do this in a slow cooker (which I doubt most of my fellow law students own), but it can also be done in an oven. Preheat oven to 350 degrees F. Place the chicken in a small baking dish and pour the BBQ sauce over the top. I like to add a few dashes of Tabasco for extra kick. Cover with foil and cook until the chicken is no longer pink and the juices run clear. Shred with two forks. Serve shredded chicken on toasted hamburger buns with a scoop of coleslaw. And if you’re really feeling adventurous, open a can of baked beans and serve them alongside the sandwiches.

Roasted Garlic and Balsamic Dipping Oil
Preheat oven to 300 degrees F. Peel away the outer skin layers of a garlic bulb, leaving the skins of the individual cloves intact. Using a knife, cut off 1/4 to a 1/2 inch of the top of cloves, exposing the individual cloves of garlic. Place the bulb on a sheet of foil and a few tablespoons of olive oil on top. Add a couple dashes of salt. Wrap the bulb in the foil and place on a small baking dish. Bake in the oven for 40 minutes or so. Let cool. Squeeze out the roasted garlic cloves from their skins and put in a bowl. Add some salt and mash them with a fork. Drizzle some balsamic vinegar and a generous dose of olive oil over the roasted garlic and add some chili flakes, dried herbs (basil, rosemary, or oregano would be good) and more salt, if desired. Serve with crusty bread.

Wednesday, March 2, 2011

Banana Bread & Baked Good Giveaway!

The smell of banana bread baking in the oven is one of life's simple pleasures. I buy bananas specifically for them to turn brown and be baked into bread...or pancakes...or muffins. Otherwise, they are definitely not my go-to fruit of choice (more of an apple girl--that's what Washington's known for, after all). I've included some photos to help you follow the recipe. Be warned, however. The third-to-last picture is a bit graphic and not for the faint of heart. I cut myself on a metal edge of a defective disposable loaf pan. But don't worry. The other two pans used to make the bread were in the oven when the kitchen mishap occurred.

I have been coming up with a lot of ideas for this blog. I'd love to somehow include my friends and readers into my entries. I've found much of my inspiration in a lovely book I received for Christmas--Food, Fashion, Friends. The author, Fleur Wood (an Australian fashion designer), throws these lavish, beautiful parties for her friends.  The book highlights her fresh styling and food ideas through gorgeous and artistic photography. I'd love to have a weekly (or as often as I can actually make it happen) "Food with Friends" post.  If you're interested in being featured, let me know and we can collaborate & cook something special together. 

I would also like to hear what kinds of recipes you're interested in seeing here.  For example, quick-fix ideas for us busy law students?  More desserts?  Healthier options?  To incentivize you to give me suggestions and ideas, I will take the names of all those who contribute by Friday at 5 pm and randomly choose one winner.  Your award?  A certificate good for one batch of cookies or a batch of brownies. So, comment away!

The Ultimate Chocolate Chip Banana Bread

 How it most always begins in the baking world: butter and sugar.


 Mix the two until creamy and fluffy.


 Add the eggs and vanilla.


 Perfect for banana bread. The riper, the better (well...to an extent).


 See? With the Ziploc trick, there's no mess and one less bowl to clean!


 Squeeze-play.


 Dry, meet Wet.


 Chocolate makes everything better: broken hearts, bad days, headaches, PMS...even banana bread.


 Ready for the oven.


 Oops.


 Ready to be eaten.


Soooo good. Especially with butter. NOM NOM!


Ingredients
1/2 cup salted butter, softened to room temperature
1/2 cup white granulated sugar
1/2 cup packed brown sugar
2 eggs
1 teaspoon vanilla extract
1/2 cup sour cream
1 cup mashed super-ripe banana (about 2 bananas)
1 1/2 cups all-purpose flour
1 teaspoon baking soda
1/4 teaspoon cinnamon
dash nutmeg
1/2 teaspoon salt
1/2 cup chopped nuts (omit if you don't like nuts)
1 cup semisweet chocolate chips

Directions

1. Preheat oven to 350 degrees F. Grease 1 large loaf pan, or 2 smaller loaf pans.

2.  In a large bowl, cream butter and sugars with an electric mixture until fluffy.

3.  To the butter-sugar mixture, add eggs and vanilla, sour cream and mashed banana. Mix until ingredients are fully incorporated. Tip: An easy and less-messy way of mashing your bananas is to place them (peeled of course) into a plastic Ziploc bag. Seal the bag and then mash away with your hands until you have the consistency of baby food. Then, snip off one of the bag’s corners and squeeze the mashed banana into your mixing bowl. Easy as that!

4.  In a smaller bowl, sift together the flour, baking soda, cinnamon, nutmeg, and salt.  Add dry ingredients to the wet ingredients, mixing with a wooden spoon until just combined.  Fold in nuts (if desired) and chocolate chips. Note: Do not overmix. You’ll overwork the glutens in the flour and end up with a less delicate crumb and a tougher, chewier final product (we don’t want that here).

5.  Pour batter into prepared loaf pan(s). Bake at 350 degrees F for 40 minutes to an hour (it will depend on your oven and whether you’re making one or two loaves). The bread is done when a toothpick inserted to the center of the loaf comes out clean. 

6.  Let cool for 10-15 minutes before trying to remove the bread from the pans. Serve with butter.

Thursday, February 24, 2011

Tortilla Soup for Your Man's Soul

Is the way to a man’s heart really through his stomach?   Duh!  While not the only way (you can use your imagination for some alternate routes), I think it’s a safe bet to say that being able cook your guy a delicious home-cooked meal is a sure way to earn a few brownie points (and even more if you serve him brownies for dessert…see previous post!).  And to my domestically-disinclined female readers out there, DON’T FRET.  It doesn’t take much skill or ability to whip up a really great dinner for your man.  For my law ladies in particular: if you can get through the excruciatingly boring, ungrammatical, tedious rambling in our assigned judicial opinions, you can follow this recipe.  Trust me.  Unlike those so-called “justices,” I won’t make things excessively complicated for no reason whatsoever.  

And best of all, this not only tastes BOMB, it’s actually healthy.  Shocker, I know.  You’re probably asking yourself, “Why would she even risk using the 'H' word to describe a meal that she wants me to cook for him?”  But I totally get it. No guys like “healthy” food…or so they think.  But there are so many fantastic healthy recipes out there that no man would ever begin to imagine as being remotely nutritious.  Why? Because they are packed with flavor, spice, and fresh ingredients (just like this recipe).  Healthy food doesn’t have to be bland, boring, reminiscent of cardboard, or include wheat germ or spinach in the ingredient list.  Try making my tortilla soup and you’ll discover this first hand.  Just remember not to tell him it’s healthy before he digs into his first of many bowls.  No preconceived notions allowed!  And, to any guy for whom I’ve made this dish in the past...I sure fooled you, didn’t I?  ;)

Devon’s Chicken Tortilla Soup


Ingredients
1 tablespoon olive oil
1 medium yellow onion, chopped
1 medium green bell pepper, chopped
1 jalapeno, minced (de-seed and de-vein if you don’t like things spicy, or omit altogether)
3 cloves garlic, minced
1 tablespoon chili powder
1 teaspoon ground cumin
1/2 teaspoon dried oregano
1 (14-ounce) can crushed tomatoes
1 (14-ounce) can diced tomatoes
1 (4-ounce) can chopped green chilies
4 cups chicken broth (more or less, depending on how thick you want your soup)
1 cup frozen yellow corn
2 uncooked boneless, skinless chicken breast halves, cut into bite-sized pieces (again, shredded rotisserie chicken meat can be used here, too)
1 (15-ounce) can black beans, rinsed and drained
Optional—for a thicker, chili-like consistency, I sometimes also add a can of refried beans. Feel free to substitute pinto beans, white kidney beans, really any kind of bean, for the black beans.
1/4 cup chopped fresh cilantro
1 lime, juiced
Salt and pepper to taste

Suggested accompaniments
Crushed tortilla chips
Guacamole or sliced avocado
Shredded Cheddar or Monterey Jack cheese
Sour cream
Chopped cilantro

Directions
1. In a soup pot, heat oil over medium heat. Sauté onion, bell pepper, and jalapeno in oil for 2 minutes. Add garlic. Continue cooking until soft, stirring occasionally (approx. another 3 minutes).

2. Stir in chili powder, cumin, and oregano, cook for 1 minute. Add tomatoes, green chilies, and chicken broth. Bring to a boil and simmer 10 minutes.

3.  Add frozen corn, chicken, and black beans. Simmer for at least 10 minutes, or longer for better flavor.

4.  Right before serving, stir in chopped cilantro, fresh lime juice, and salt and pepper to taste.

5.  Serve soup with suggested accompaniments. Enjoy!

Notes: Please adjust spices and seasonings to your liking. Another nice way to both thicken and flavor the soup is to add crushed tortilla chips while the chicken cooks. Adding a dollop of sour cream to the entire pot before serving also lends a creamier texture.


Tuesday, February 22, 2011

Never-Fail-Always-Perfect Brownies (if only life were like these...)

What a weekend!  It was great to have four law school-free days, but they were definitely jam-packed.  My sister moved down to LA, my friend turned 23, I went to Costco (my fav!), dealt with unnecessary law school section drama, I had a job interview (and got the JOB!) … and, unsurprisingly, managed to do barely any school work.  Oh well.  It happens.  

I think I can finally say that, for the first time in six or so months, I feel like I’m walking on solid ground again.  The start of my law school experience brought with it a multitude of changes—leaving behind my stable life in Seattle and moving to an entirely new state, ending a rather long-term relationship (and subsequently starting a new one…which has also ended), adapting to an entirely new field of study and way of learning, and forming new friendships with so many great people.   Needless to say, it’s been an intense ride filled with extreme highs and devastating lows.   Before I left home last July, I never would have imagined that I’d go through so much in such a short period of time.

But the tumultuous journey that I’ve had since the start of this whole process has only served to make me a stronger person.  I’ve learned to trust myself more.  Life is not predictable and things aren’t always perfect.  I know life’s going to throw me a few (or maybe many) curveballs here and there.  I’m confident that I’ll be able to deal with them just fine…maybe even hit one out of the park :)  I’ve come to realize that the shitty times sure do make those future good days seem that much better.  

When life isn’t predictable, I bake.  I have my go-to recipes—my recipes that always turn out perfectly if I follow just a few easy steps.  These brownies are THE BEST and they’ve never failed me.  So next time you’re dealing with one of those inevitable curveballs, do something that you know you have control over.  For me, it’s stepping into the kitchen and whipping up a batch of Never-Fail-Always-Perfect Brownies. Enjoy.

Never-Fail-Always-Perfect Brownies
(Adapted from Brooke’s Bombshell Brownies @ www.allrecipes.com)


Ingredients:
1 cup unsalted butter, melted
2 cups granulated sugar
1 cup light brown sugar, packed
1 tablespoon vanilla extract
4 large eggs
1-1/2 cups all-purpose flour, sifted
1 cup unsweetened cocoa powder, sifted
1 teaspoon salt
1 cup semi-sweet chocolate chips (or any other flavor chip…mint chips are fantastic!)

Directions:
1. Preheat oven to 350 degrees F.  Grease a 9x13-inch glass baking dish.
2. In a large bowl, combine butter, sugar, and vanilla with a wire whisk until blended. 
3. Add eggs, one at a time, and mix well after each addition. 
4. In a separate bowl, sift together the flour, cocoa powder, and salt. 
5. With a wooden spoon or spatula, add the flour mixture into the butter/sugar mixture until just combined (do not overmix).  Stir in chocolate chips, if desired. 
6. Pour batter into prepared baking dish.  Bake for 30-40 minutes, checking frequently for doneness.  Let them cool for as long as you can stand it…brownies are way easier to cut into squares when they aren’t fresh out of the oven.

Note: Overcooked brownies are just not good (worse than undercooked).  Take them out early if you aren’t sure—can’t go wrong with a gooey, fudgy brownie (but you definitely can with a dry, burnt brownie!).  I usually don’t wait until a toothpick comes out completely clean.  At that point, I’ve found that the brownies end up being too dry for my liking.