Alright, I no longer have any excuses for being a blogging failure. First year of law school...
over. Moving to a new apartment...
finished. Starting summer clerkship...
one week down. My kitchen is all set up, I have my Kitchen-Aid mixer sitting on my counter (thanks, Mom!), and I'm ready to cook and bake!
My mom has been visiting me this past week and we've been reminiscing about things from my childhood. I was trying to pinpoint when exactly I became so interested in cooking and baking. My mom insists that I've loved playing in the kitchen since the beginning. I believe her. Here I am helping bake Valentine's Day cookies at age 2.
She also reminded me of my 5th grade science fair project: The Magic of Baking. I altered the amount of baking powder in muffins (from no leavening to twice what was called for in the control recipe). I then measured the height of the muffins and enlisted my family to be taste-testers. Unsurprisingly, we all agreed that the control recipe looked and tasted the best. Sometimes, however, little tweaks here and there can drastically improve an otherwise so-so recipe.
I can't even begin to estimate how many different chocolate chip cookie recipes I have tried in pursuit of finding the "perfect" one. I started with the Tollhouse recipe on the back of the chocolate chips bag. Nope, not it. I then surveyed all of my mom's cookbooks. Mrs. Fields's recipe? Meh. Only okay. Betty Crocker's? I tried different amounts of flour, vanilla, sugar, and other ingredients and ultimately came up with my own recipe. They were pretty close to perfect. Chewy and soft in the middle, crispy on the outside. Just enough salt. Not cakey at all. I thought my search was over.
A few years ago, I was waiting in a grocery store line and picked up an issue of Cook's Illustrated magazine. CI is right up my alley. All of the recipes are extensively tested and the instructions are extremely detailed. Baking really is science. I think that's part of why I enjoy it so much (hence my 5th grade project).
Flipping through the magazine, I found
this article. Perfect chocolate chip cookies? Hmm...I had to see if this recipe lived up to mine. So, naturally, I immediately went home and tried it. A-MAZ-ING. I was so wrong thinking I had reached perfection with my personalized chocolate chip cookie recipe. If my cookies were great, these were incredible. I think it all comes down to the brown butter. It adds a nutty, toffee-like flavor dimension that you just don't get in most other cookie recipes. I actually think this method is even easier than creaming the butter and sugar with a mixer, as called for in standard cookie recipes. No mixer required for this one!
I've used this dough to make white chocolate macadamia nut cookies, I've substituted some of the flour for ground oatmeal, and I've added dried fruit instead of chocolate. Now I can say that chopped up candy bars make a great chocolate chip substitute as well. Try this recipe, or go experiment on your own and let me know what turns out well for you!
Ingredients
1 3/4 cups all-purpose flour
(8 3/4 ounces if you have a food scale)
1/2 teaspoon baking soda
14 tablespoons unsalted butter (1 3/4 sticks)
1/2 cup granulated sugar (3 1/2 ounces)
3/4cups packed dark brown sugar (5 1/4 ounces) (light is fine, too)
1 teaspoon salt
2 teaspoons vanilla extract
1 large egg
1 large egg yolk
2 cups chopped candy bars (any kind)
Instructions
1. Heat oven to 375 degrees. Line 2 baking sheets with parchment paper or, if you have them, use Silpat baking mats. Chop your candy bars. Whisk flour and baking soda together in medium bowl; set aside.
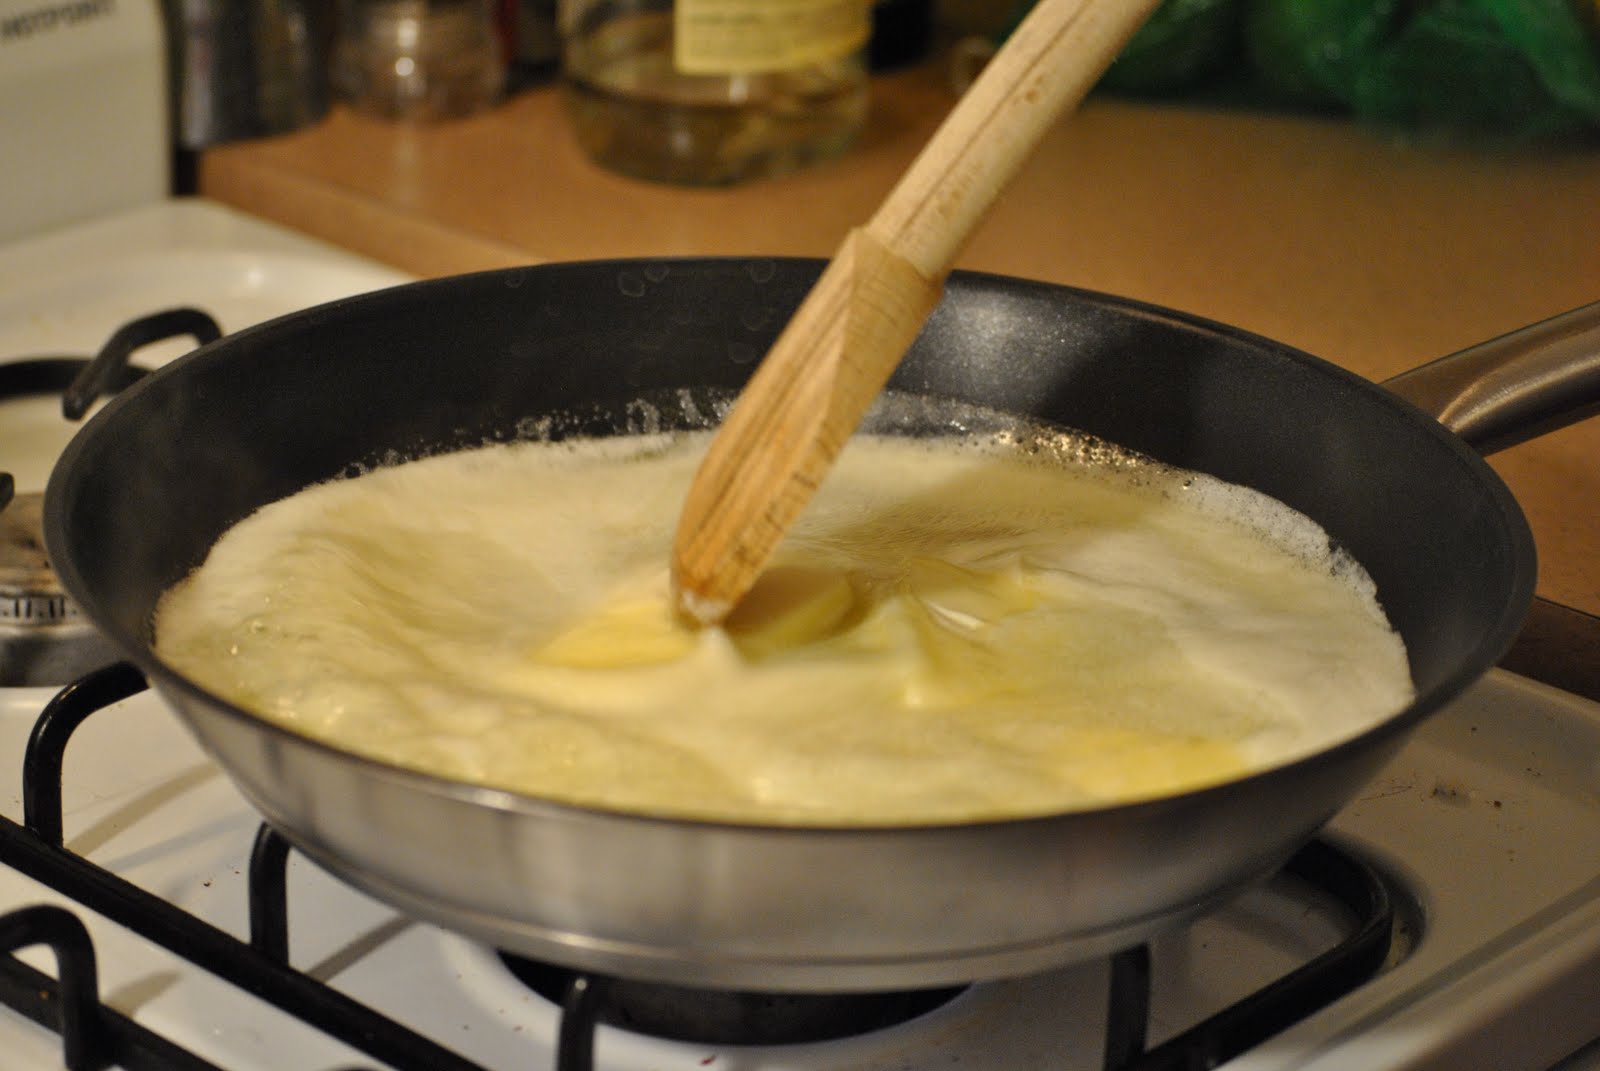
2. Heat 10 tablespoons of the butter in 10-inch skillet over medium-high heat until melted, about 2 minutes. Continue cooking, swirling or whisking the pan constantly until butter is dark golden brown and has nutty aroma, about 1 to 3 minutes. Remove skillet from heat and, using heatproof spatula, transfer browned butter to large heatproof bowl. Stir remaining 4 tablespoons butter into hot butter until completely melted.
3. Add both sugars, salt, and vanilla to the bowl with butter and whisk until fully incorporated. Add egg and yolk and whisk until mixture is smooth with no sugar lumps remaining, about 30 seconds. Let mixture stand 3 minutes, then whisk for 30 seconds. Repeat process of resting and whisking 2 more times until mixture is thick, smooth, and shiny.
4. Using a wooden spoon, stir in flour mixture until just combined, about 1 minute. Stir in candy bar chunks.
5. Divide dough into 16 portions, each about 3 tablespoons (or use a big cookie scoop). Arrange 2 inches apart on prepared baking sheets.
6. Bake cookies until golden brown and still puffy, and edges have begun to set but centers are still soft, 10 to 14 minutes, rotating baking sheet halfway through baking. Transfer baking sheet to wire rack; cool cookies completely before serving.
A special thanks to Radha Kulkarni for helping me with the photos for this post!